SEMM 1503 Engineering Drawing
Synopsis
This subject introduces student to the use of technical drawing in an effective way for communicating and integrating with engineering concepts. Such environment will provide a platform where the engineer can share and exchange information. This subject will also enlighten the student on the significant changes in the engineering and technical graphic due to the use of computer and CAD (Computer Aided Design) software. At the end of the course, student should be able to apply the skill and knowledge of engineering drawing to interpret design, using graphics method such as geometric drawing, orthographic projection, isometric, machine drawing, detailed drawing, and basic CAD software.
Course Learning Outcomes
| 1. | Identify and define the basic requirements of engineering drawing according to standard |
| 2. | Translate objects into geometry and orthographic drawings |
| 3. | Construct assembly and detail drawing, and solid modeling |
| 4. | Translate objects into sectional and isometric drawings |
Teaching Methodology
- Lecture will given to expose the student on the principle of engineering drawing
- Students are required to attend studio to have an hand-on practice on engineering drawing
- Students are required to produce a complete production on selected product for the project
Schedule
|
Week |
Topics |
Comments |
|
|
1 |
Manual:Introduction to Engineering Drawing Drawing Instruments, Type of Lines, Text and Numbering, Dimensioning and Scaling, Standards
CAD: SolidWorks Basics and User Interface Keyboard Shortcuts, Feature Manager Design Tree, Property Manager, Task Pane, Mouse Buttons, Options Sketch – Sketch Entities, Basic Sketching, Sketch Relations, dimensioning, basic printing and scaling.
|
Course Preparation
CAD Assignment1 (Basic shapes with dimensioning and printing) |
|
|
2 |
Manual:Geometry Basic drawing construction – Lines, Arcs, Circles, Geometrical method for straight lines Geometrical method for curves
CAD: 2D Sketching Sketch editing – fillet, chamfer, trim, extend, pattern Preparing title block and printing |
Manual: Assignment 1 (geometry)
CAD Assignment 2 (geometry) |
|
|
3 |
Manual: Geometry Drawing method for common shapes – Polygon, Ellipse CAD: Basic Part Modeling 1 Sketch Plane – Top/Front/Right Fully defined sketch Part 1 – Basic Extrusion – Extrude Boss/Base, Extruded Cut |
Manual: Assignment 2 (geometry)
CAD Assignment 3 (Part Modeling) |
|
|
4 |
Manual: Orthographic Definition of orthographic projection 1st Angle Projection 3rd Angle Projection Projection Symbol Orthographic drawing dimensioning.
CAD: Part Modeling 2 Drawing layout, Paper Size, Drawing Block Template, View palette, Drawing Scale Center line/Center mark – Auto/Manual Dimensioning/Auto dimensioning |
Manual: Assignment 3 (orthographic)
CAD Assignment 4 (Orthographic Drawing with dimensions from Part Modeling) |
|
|
5 |
Manual: Orthographic
CAD: Part Editing Fillet, Chamfer, Mirror Part Modeling Revolve, Sweep, Rib
|
Manual: Assignment 4 (orthographic)
CAD Assignment 5 (Part with Revolve/Sweep,Holes, Rib) |
|
|
6 |
Manual: Orthographic
CAD: Patterning Reference Geometry, Linear Pattern, Circular Pattern, Mirror Pattern, Pattern Seed |
Manual: Assignment 4 |
|
|
|
|||
|
CAD: Isometric representation of part modelling |
|||
|
|
|||
|
7 |
Manual: Orthographic – Basic development
CAD: Sheet metal for Object Development Convert object to sheet metal Flatten Object Convert to drawing layout Or Application of Third -party freeware – Pepakura Designer
|
Manual; Assignment 5
CAD: A simple Hopper modelling, unwrap/flattening and printing |
|
|
|
|||
|
8 |
Manual: Test 1
CAD: Part Editing Shell, Draft View Orientation and View Palette for Isometric Representation
|
CAD: part modelling and iso representation |
|
|
9 |
Semester Break |
|
|
|
10 |
Manual: Isometric
CAD: Editing Repairs-Part Editing, Fillet Xpert Design Changes-Rebuilding Tools,Sketch Contours |
Manual: Assignment 6 (Isometric Sketch)
Assigning CAD Project to Students |
|
|
11 |
Manual: Sectioning CAD: Using Drawing Section View, Model View, Broken View, Detail View Drawing Sheet and Sheet Format, Annotations Printing |
Manual: Assignment 7
|
|
|
|
|||
|
CAD: Project Pursuit |
|||
|
|
|||
|
12 |
Manual: Sectioning CAD: Bottom-Up Assembly Modeling Creating A New Assembly, Adding Component, Sub-Assemblies, Smart Mate |
Manual: Assignment 8
|
|
|
|
|||
|
CAD: Project Pursuit |
|||
|
|
|||
|
13 |
Manual: Machine Drawing
CAD: Using Standard Library – Bolt, Nut, Washer,etc. |
Manual: Assignment 9 |
|
|
|
|||
|
CAD: Project Pursuit |
|||
|
|
|||
|
14 |
Manual: Working drawing Assembly Drawing, Exploded Drawing, Detail drawing
CAD: Using Assemblies
Drawing Layout – Scale, Basic dimensions Section Views Bill of Materials Annotation – Adding Balloons, BOM, Editing Exploded View and Explode Line Sketch |
Manual: Assignment 10
CAD: Project Pursuit |
|
|
15 |
Manual: Assembly
CAD: Project Pursuit & Discussion |
Test #2*
|
References
- David L. Goetsch, William S. Chalk, John A. Nelson and Raymond L. Rickman (2005), Technical Drawing , Fifth edition, Thomson Delmar Learning
- James M. Kirkpatrick (2003), Basic Drafting Using Pensil Sketches and AutoCAD, Prentice Hall
- Khairul Anwar Hanafiah (2006), Lukisan kejuruteraan berbantu computer, Edisi kedua, Penerbit UTM
- Khairul Anwar Hanafiah (2003), Latihan AutoCAD SMJ1503 – versi 2, CD – ROM format
- Mohd Fadzil Daud dan Khairul Anwar Hanafiah (2005), Panduan asas lukisan kejuruteraan, Edisi kedua, Penerbit
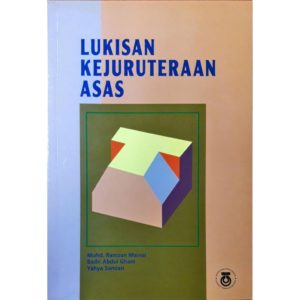
- Mohd Ramzan Manial, Yahya Samian dan Badri Abdul Ghani (1996), Lukisan kejuruteraan asas, Edisi kedua, Penerbit UTM
Attendance
- Student must attend not less than 80% of lecture hours as required for the subject.
- The student will be prohibited from attending any lecture and assessment activities upon failure to comply the above requirement. Zero mark will be given to the subject.
Notes
SKMM 1503 Engineering Drawing L1 | CLO Matrix
Chapter 0001 Introduction
Chapter 0002 Using Drawing Tools
Chapter 0003 Orthographic Projection
Chapter 0004 Orthographic Writing
Chapter 0005 Pictorial Sketching
Chapter 0006 Orthographic Reading
Chapter 0007 Dimensioning
Chapter 0008 Orthographic Convention
Chapter 0009 Section
Chapter 0010 Convention in Section
Chapter 0011 Thread Fastener
Chapter 0012 Working Drawing
Chapter 0013 Roles of Engineering Drawing


