Assalamualaikum. In this post, I will try to focus on the topic of how to edit a Micro-Credential video in UTM from start to finish. We also going to touch on how to manage feedback from the content owner as well, and of course, dealing with the video editing itself.
Now, we may have heard the term Micro-Credential in a lot of Universities across Malaysia. They are begin to growth in a large number from time to time. But what we haven’t heard of is the way the video production process being executed from one phase to another. And sometimes when we want to search for online courses in Micro-Credential related website, we would like to see the promotional video on that course first though we may not end up register for it. But the thing is…it’s a promotional material that end users like you and me are seeking from that website. Let’s face it! Without a decent promotional video such as these, no one would ever want to surf on that website though it offers plethora of information in a form of text. Arghh!! I don’t know to whom I would like to address this simple problem with its solution. Yes you maybe have your own preference University of your choice that you want to be certified from. Be it public or private education institution. What you would like to know other than the facts and figures before you start registering for the course is the promotional material other than lengthy text, for example the video promotion itself.
But How To Edit UTM Micro-Credential Video? Are They Difficult To Execute?
They can be easily done like you prepare your own presentation slide and sometimes it can be difficult too! It all depends on the script written by the content owner. If they were carefully planned considering the fact that it is not just a normal line of text where you can type mostly anything on the word processing software, then it will be a lot easier for the technical team to understand them later. Why? Because every academic staff who shown strong passion towards developing Micro-Credential course has to join our Workshop first in order to fully understand the requirement, whatnot, and all that stuff in preparing your way to the online community out there.
But there are also a number of them who have gone viral in Youtube platform, making their own content in their own field, and have already gained a lot of viewers, subscribers, and of course the return investment towards the time they took to prepare all of the material by themselves until the end of the video production cycle. So now we see for ourselves the strong determination instilled in their own of what they can achieve in the future. Hats off to you Doc! 
So we ask ourselves again. How to edit a Micro-Credential video? Well of course you need the necessary tools before you can begin. For those who already have a video production team, they can pretty much do the editing of the video by themselves. But for those who do not have the technical skills in video editing, it could be a challenge too. Especially if the course contains movement of graphics in a complicated manner. But let me share with you a couple of tools on how to start out the course with what we have in the studio.
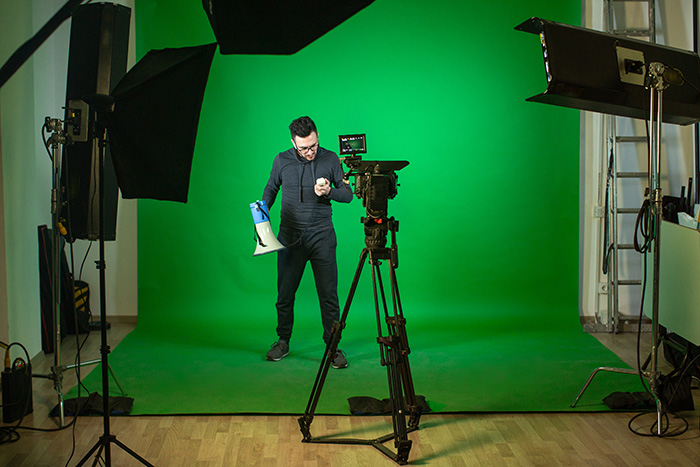
a person with speaker in studio
a person with speaker in studio

UTM_Micro_Credential-lantern

UTM_Micro_Credential-camera
UTM_Micro_Credential-audio
UTM_Micro_Credential-prompter
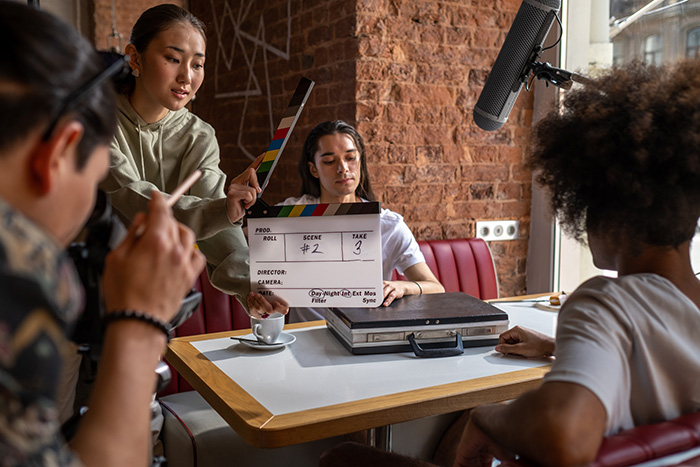
UTM_Micro_Credential-clapperboard
UTM_Micro_Credential-tripod

- Green Screen
Yes we are using green screen most of the time when shooting content of the video. Be it MOOC or Micro-Credential, all of the content owners have to prepare themselves acting in front of the camera by reading their text script placed in a teleprompter - Lights Please!
Oh wow..we have 3 pieces of them in the studio in the form of lantern softbox and they spread very nicely in our set compared to our previous set of lighting which uses traditional 4 socket bulb - Camera, action!
We have upgraded our previous Canon DSLR to Sony mirrorless system which we like the most due to its high-quality footage - Sound check, check 1, 2
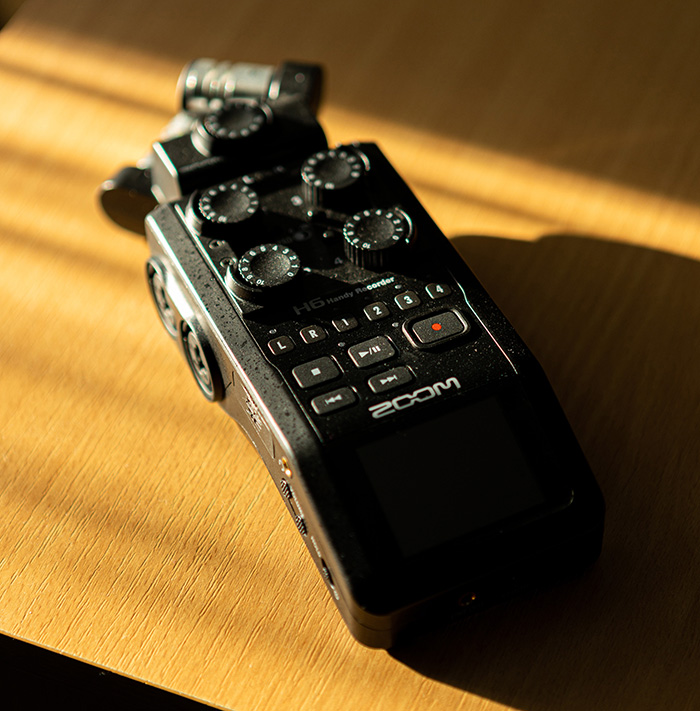
Yes, we need a good gadget in delivering high quality audio to our end users. So we have a recorder Zoom H6, a couple of G2 and G3 clip mic, Rode wireless Go II that sits on our shelf. - Teleprompter
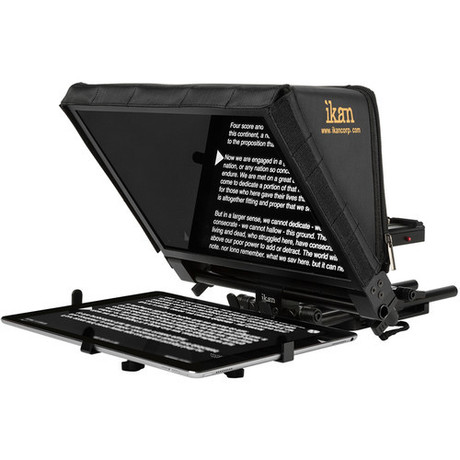
This gadget helps the presenter read their script in a controlled manner by the operator. Without it, just imagine how difficult it would be when in recording session - Clapperboard
Another helpful tool before the recording began. It will tell who’s the editor, what topic, and most important part of all the audio file number and how many Takes during recording the presenter make mistakes! - Tripod
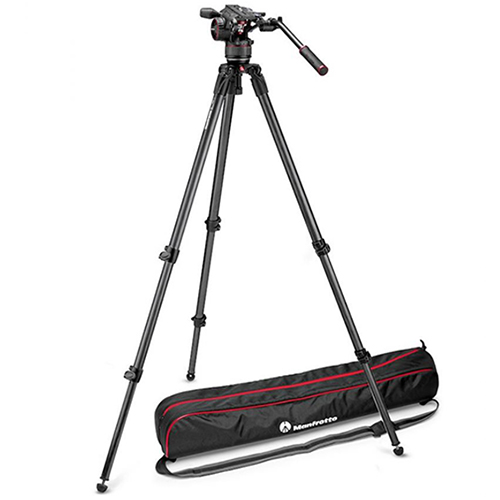
Yikes! I forgot to mention the most important tool when video shooting is in progress, the tripod itself! There are many brands out there, but we’re stick using Manfrotto tripod due to its stability and reliability
Are all of those gadgets listed above only for MOOC & Micro-Credential shooting only?
No SIR! We also have outdoor shooting sessions too. Sometimes we carried out duty by our good friend, The Office of Corporate Affairs to collab together with them. Mostly because they also have the same gadget as us and that was why we can work together as a production team. The only difference is that they are Photographers who also involve in video production at UTM as a whole. But I also noticed something very different in terms of technical detail especially the way they shoot video footage by using slog-2. This is something we don’t do in our workflow because mostly we shoot indoors on a green screen. Though sometimes I would really want to incorporate slog-2 in our workflow, the nature of our production work does not permit us to do so. Then I think I just have to wait for another exciting opportunity for future outdoor shooting sessions.
What about video editing software?
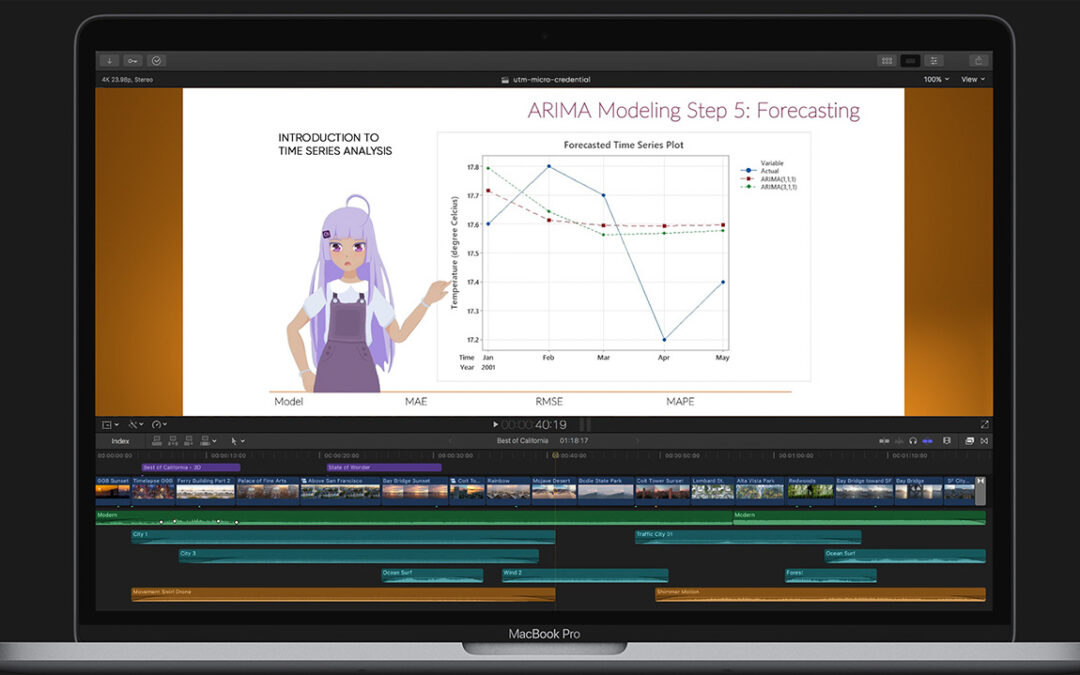
This is a good question! Why? Because there are many video editing software out there on the market that you can choose from to adopt in your post-production work. Since my office used Apple products from the very first day I carried my duty as a Producer in UTM CDex back in 2005, Final Cut Pro has been the editing suite ever since. I still remember using FCP 6 back then with its traditional timeline and gray-colored interface mimicking the early Mac Pro tower kind of color. It was the best editing suite in my opinion along with its bundled software including Compressor, Motion, Soundtrack Pro, DVD Studio Pro, and Color. But since time has passed and a lot of change has been made until they skip ahead from FCP 8 and FCP 9, the newly redesigned interface of FCP X has just got better, especially the magnetic timeline feature. It saves me a lot of time when I’m in the editing room! While I don’t have the exact perfect answer to your needs in video editing software, I leave that option to you to evaluate for yourself which editing software that really suits your post-production workflow. Though I may be a hardcore fan of Apple products and software in the office, but at home I’m still using Adobe Premiere Pro on a Windows laptop that suits my budget that not crack up my pocket too much compared to the expensive price of an apple that sold at a fruit stall somewhere inside a shopping mall. ![]()
![]()
Then how to manage feedback from the content owner?
Once we have completed the video editing process, then it’s time to upload to Youtube and send it over to the content owner for reviewing. We will ask them to check if the video follows exactly like the content from the storyboard which they made before moving to the production phase. Once they have reviewed then they will send back to us the feedback if there are amendments to be made later. Though it seems pretty rare if there are no amendments in the video content, that means you have followed all the instructions perfectly during the editing, compositing, or animation works done throughout the whole post-production process. Congratulations! You are certainly the best in your department! ![]()
![]()
Well, that’s it for now. See you again in the next post! Bye!
Jeffri Rahman
Producer | Editor | Blogger | Youtuber
https://cubitsanasini.blogspot.com