I was desperate. Indeed. Having meetings, workshops and whatsnot using Webex several times, I know what are the glitches that can happen in the middle of the meeting IF you have low internet bandwith. Well, the internet connection in my area belong to that category. I need to find other alternatives.
How can I upgrade my notes? This is the question that I ask myself repeatedly. Even though I use Prezi, but after several failing attempts of video recording of one single note, I need to take a break. I need to leave the problem aside for a while before finding another solution. This is what we call as “Incubation” in psychology (problem solving). Incubation period is important because it allows me as a problem solver to digest information and have more time to find information that needed to solve a problem.
While in incubation period, I cannot let myself idle. I watch Youtube videos or Microsoft video to get more information and tips on generating Powerpoint notes to a video (this is a kind of short-cut in problem solving using Algorithm – step by step solution). Even though I can follow the step by step instructions on Youtube and Microsoft, but I still prefer to have a written instruction with pictures. Basically, the step by step is similar with Microsoft website support office.
Before you generate your powerpoint video notes, make sure that you already prerecorded your voice (narration) in the slides presentation. Only then you can generate this video. If not, your note will not have any audio narration.
-
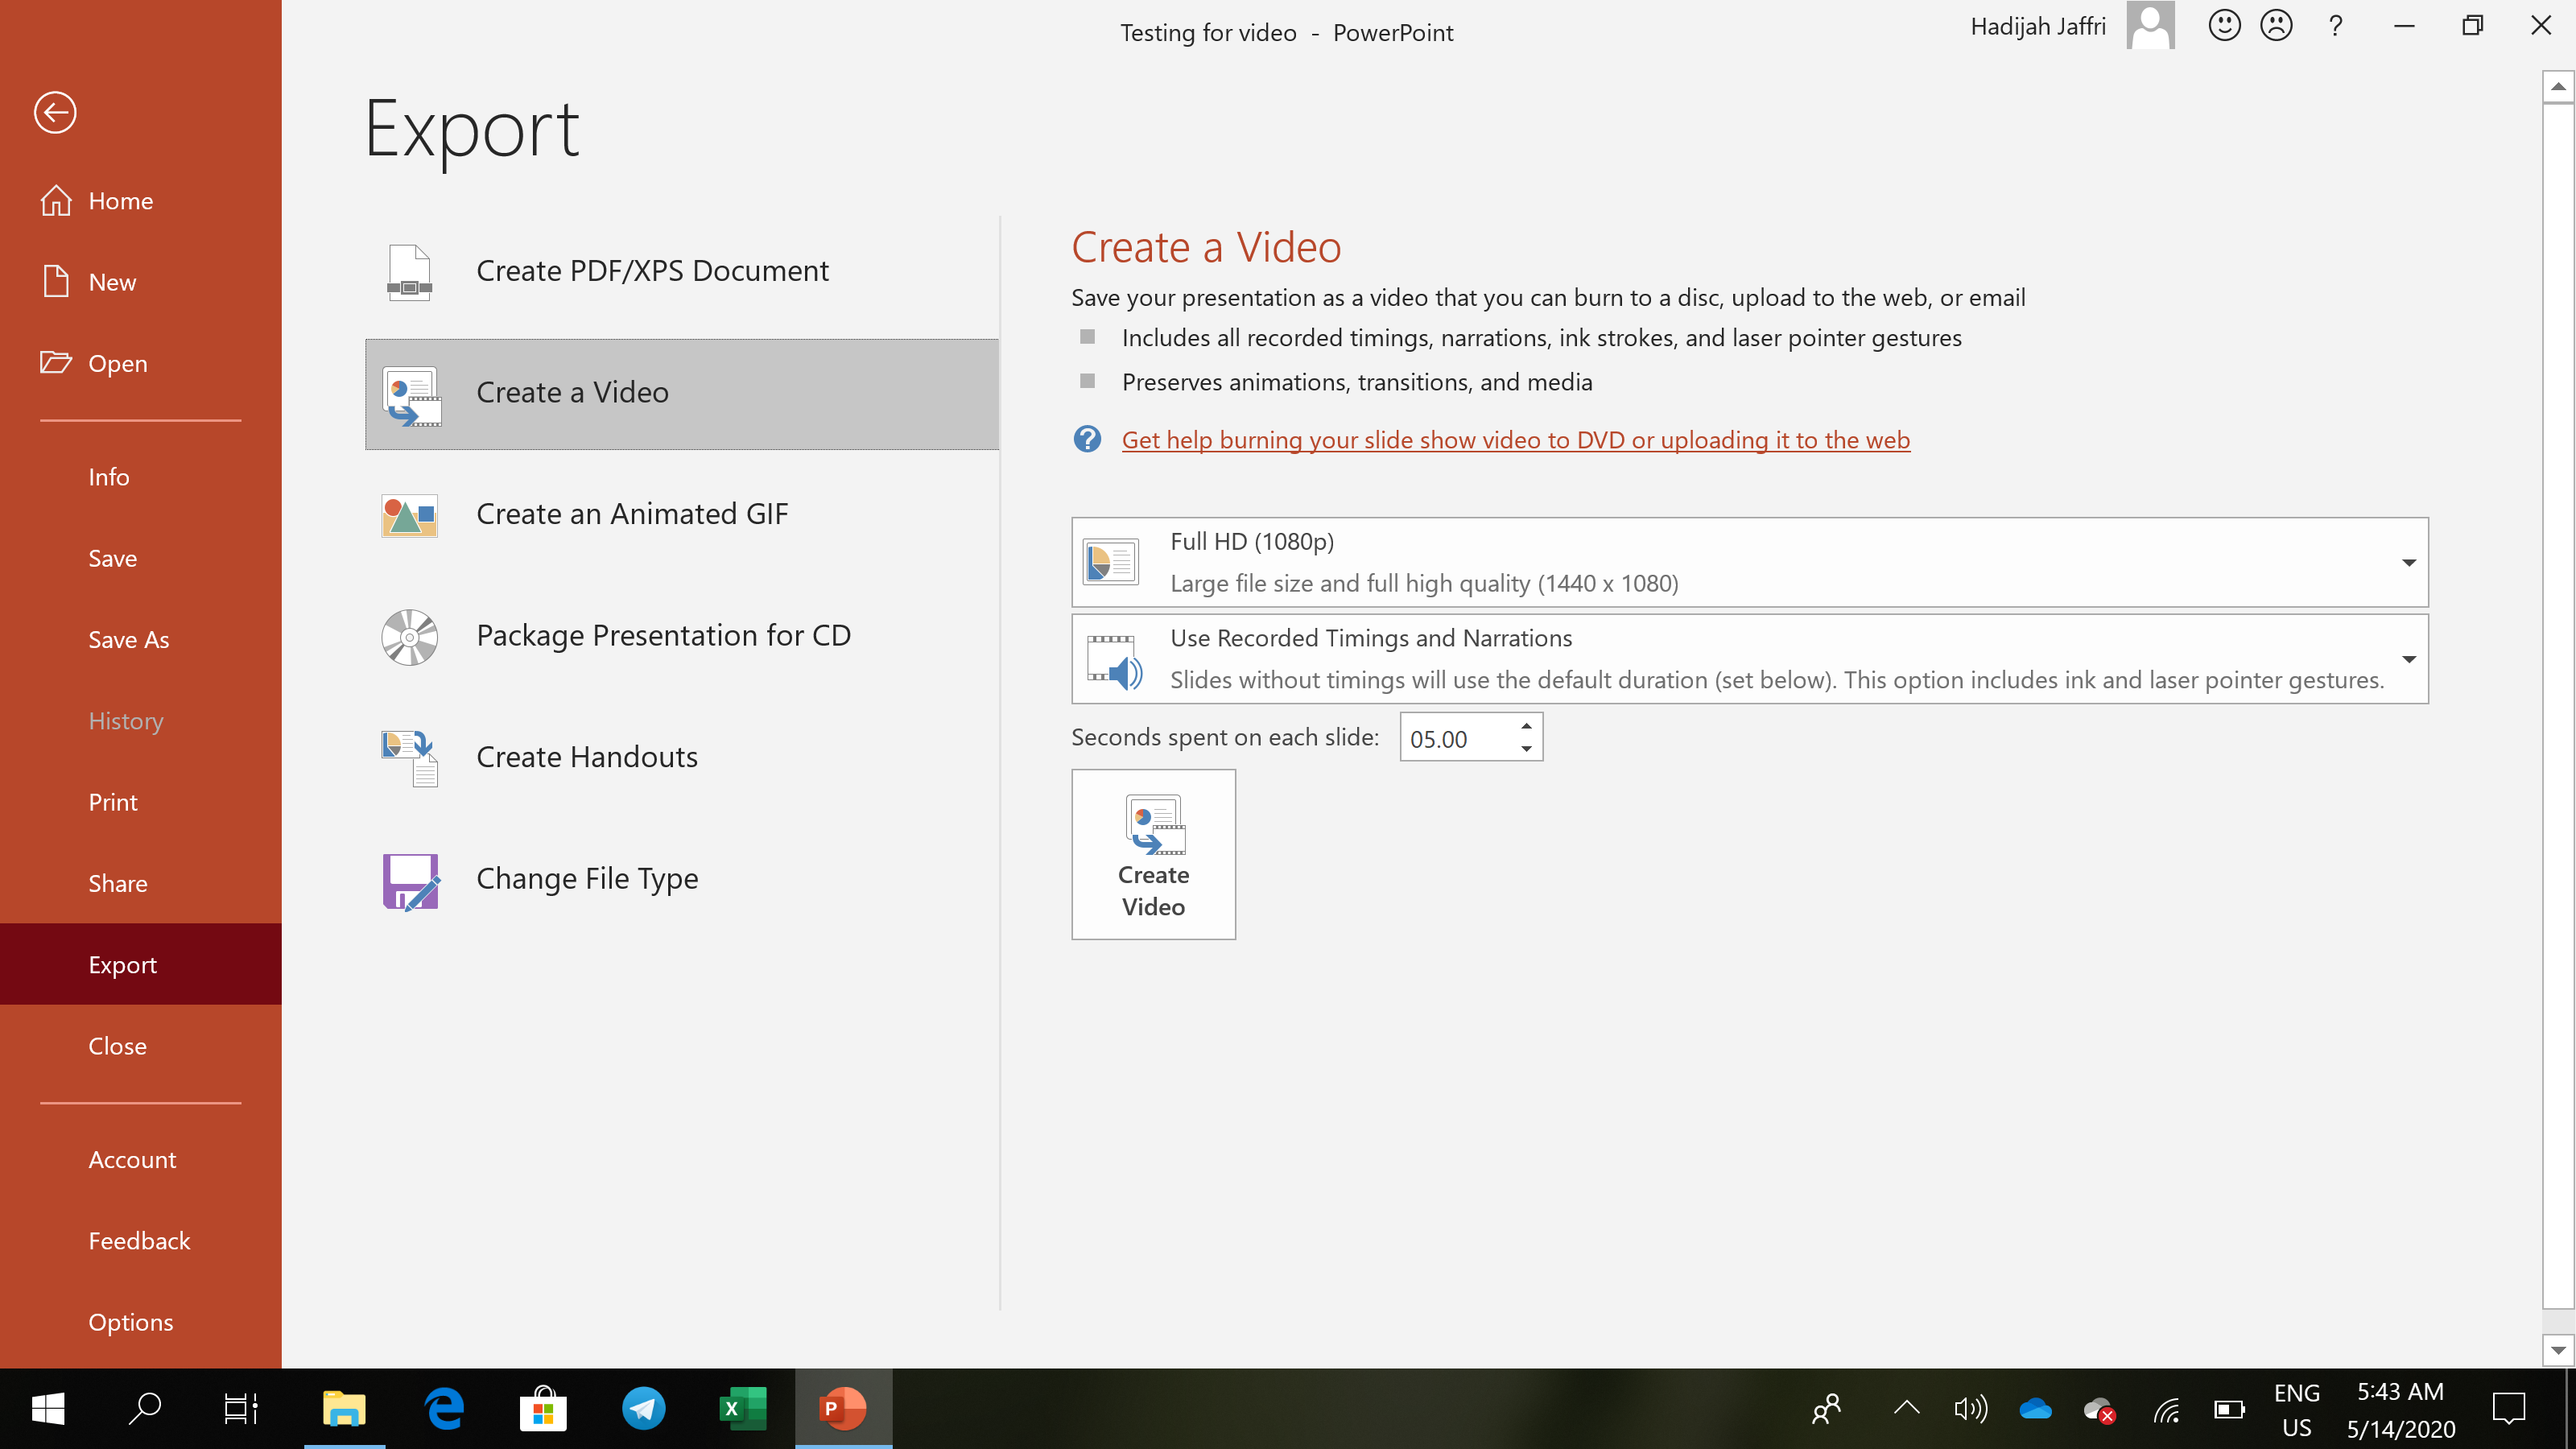
Go to File > Choose Export > Click Create a video .
.
-
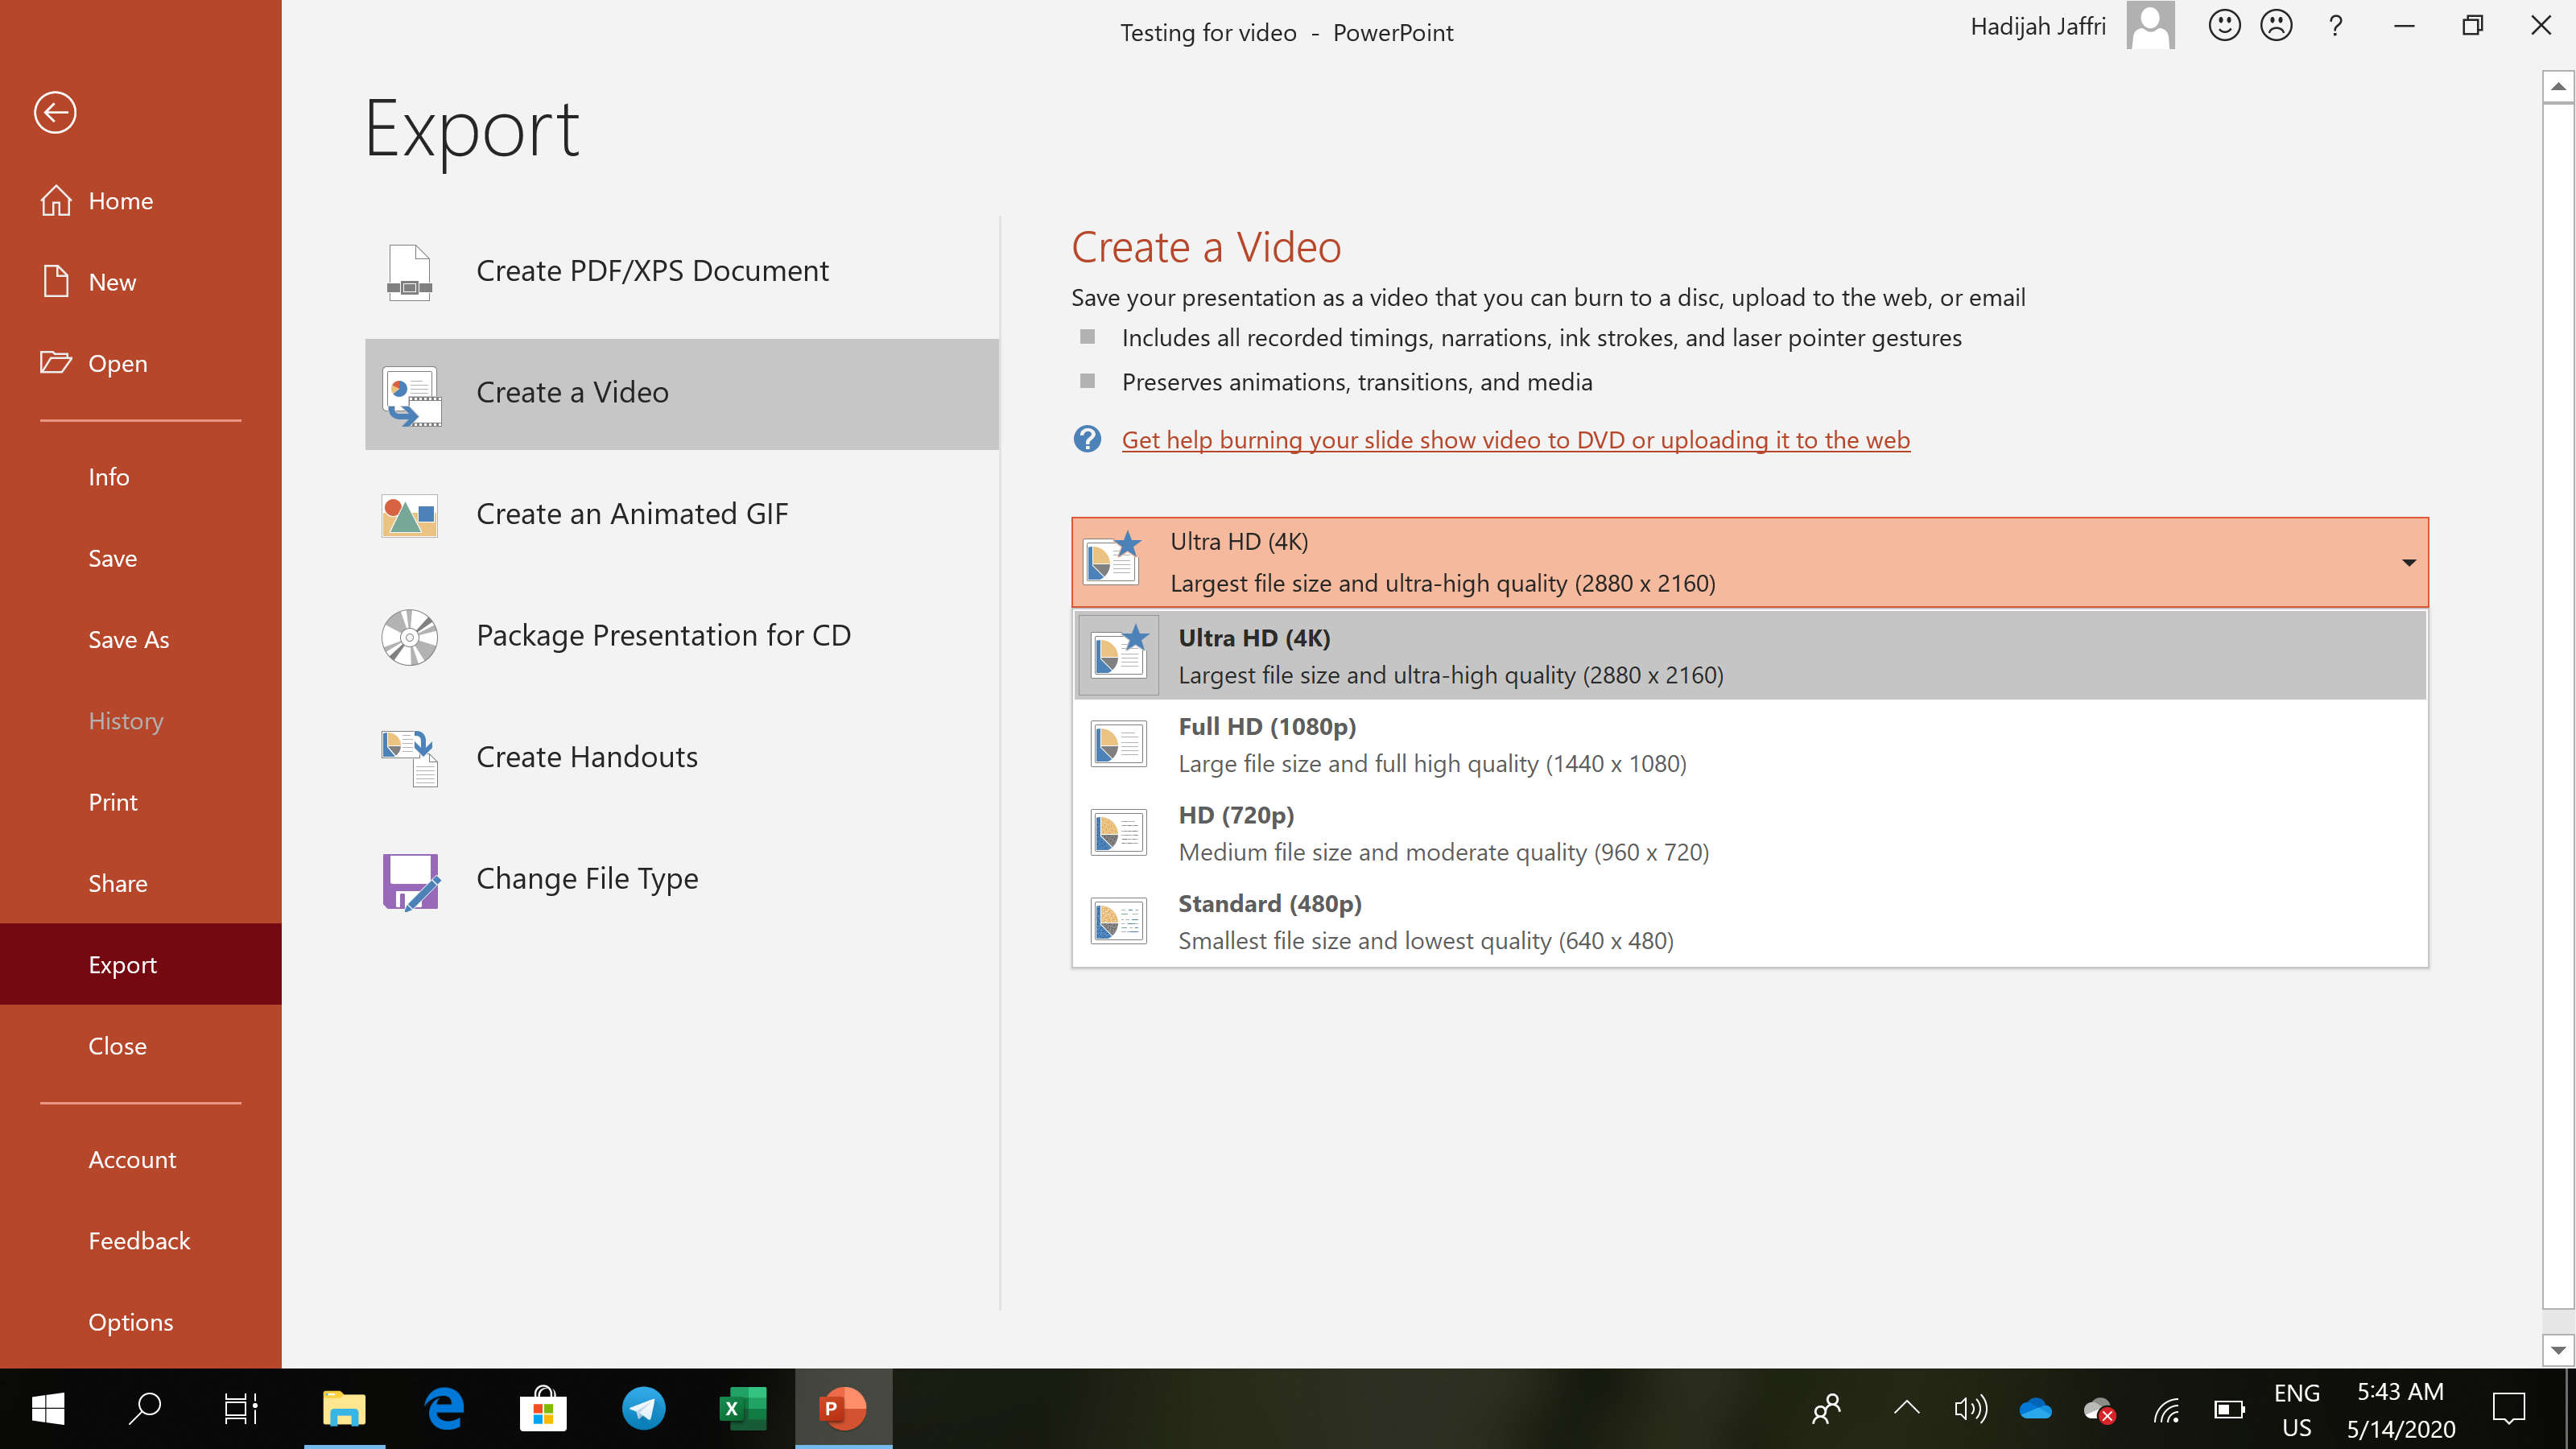
There are four (4) options on the quality of the video:
-
- Ultra HD (4K) – Largest file size and ultra-high quality (3840 x 2160).
- Full HD (1080p) – Large file size and full high quality (1920 x 1080) (I select this. Majority of Youtubers suggest this)
- HD (720p) – Medium file size and moderate quality (1280 x 720).
- Standard (480p) – Smallest file size and lowest quality (852 x 480).
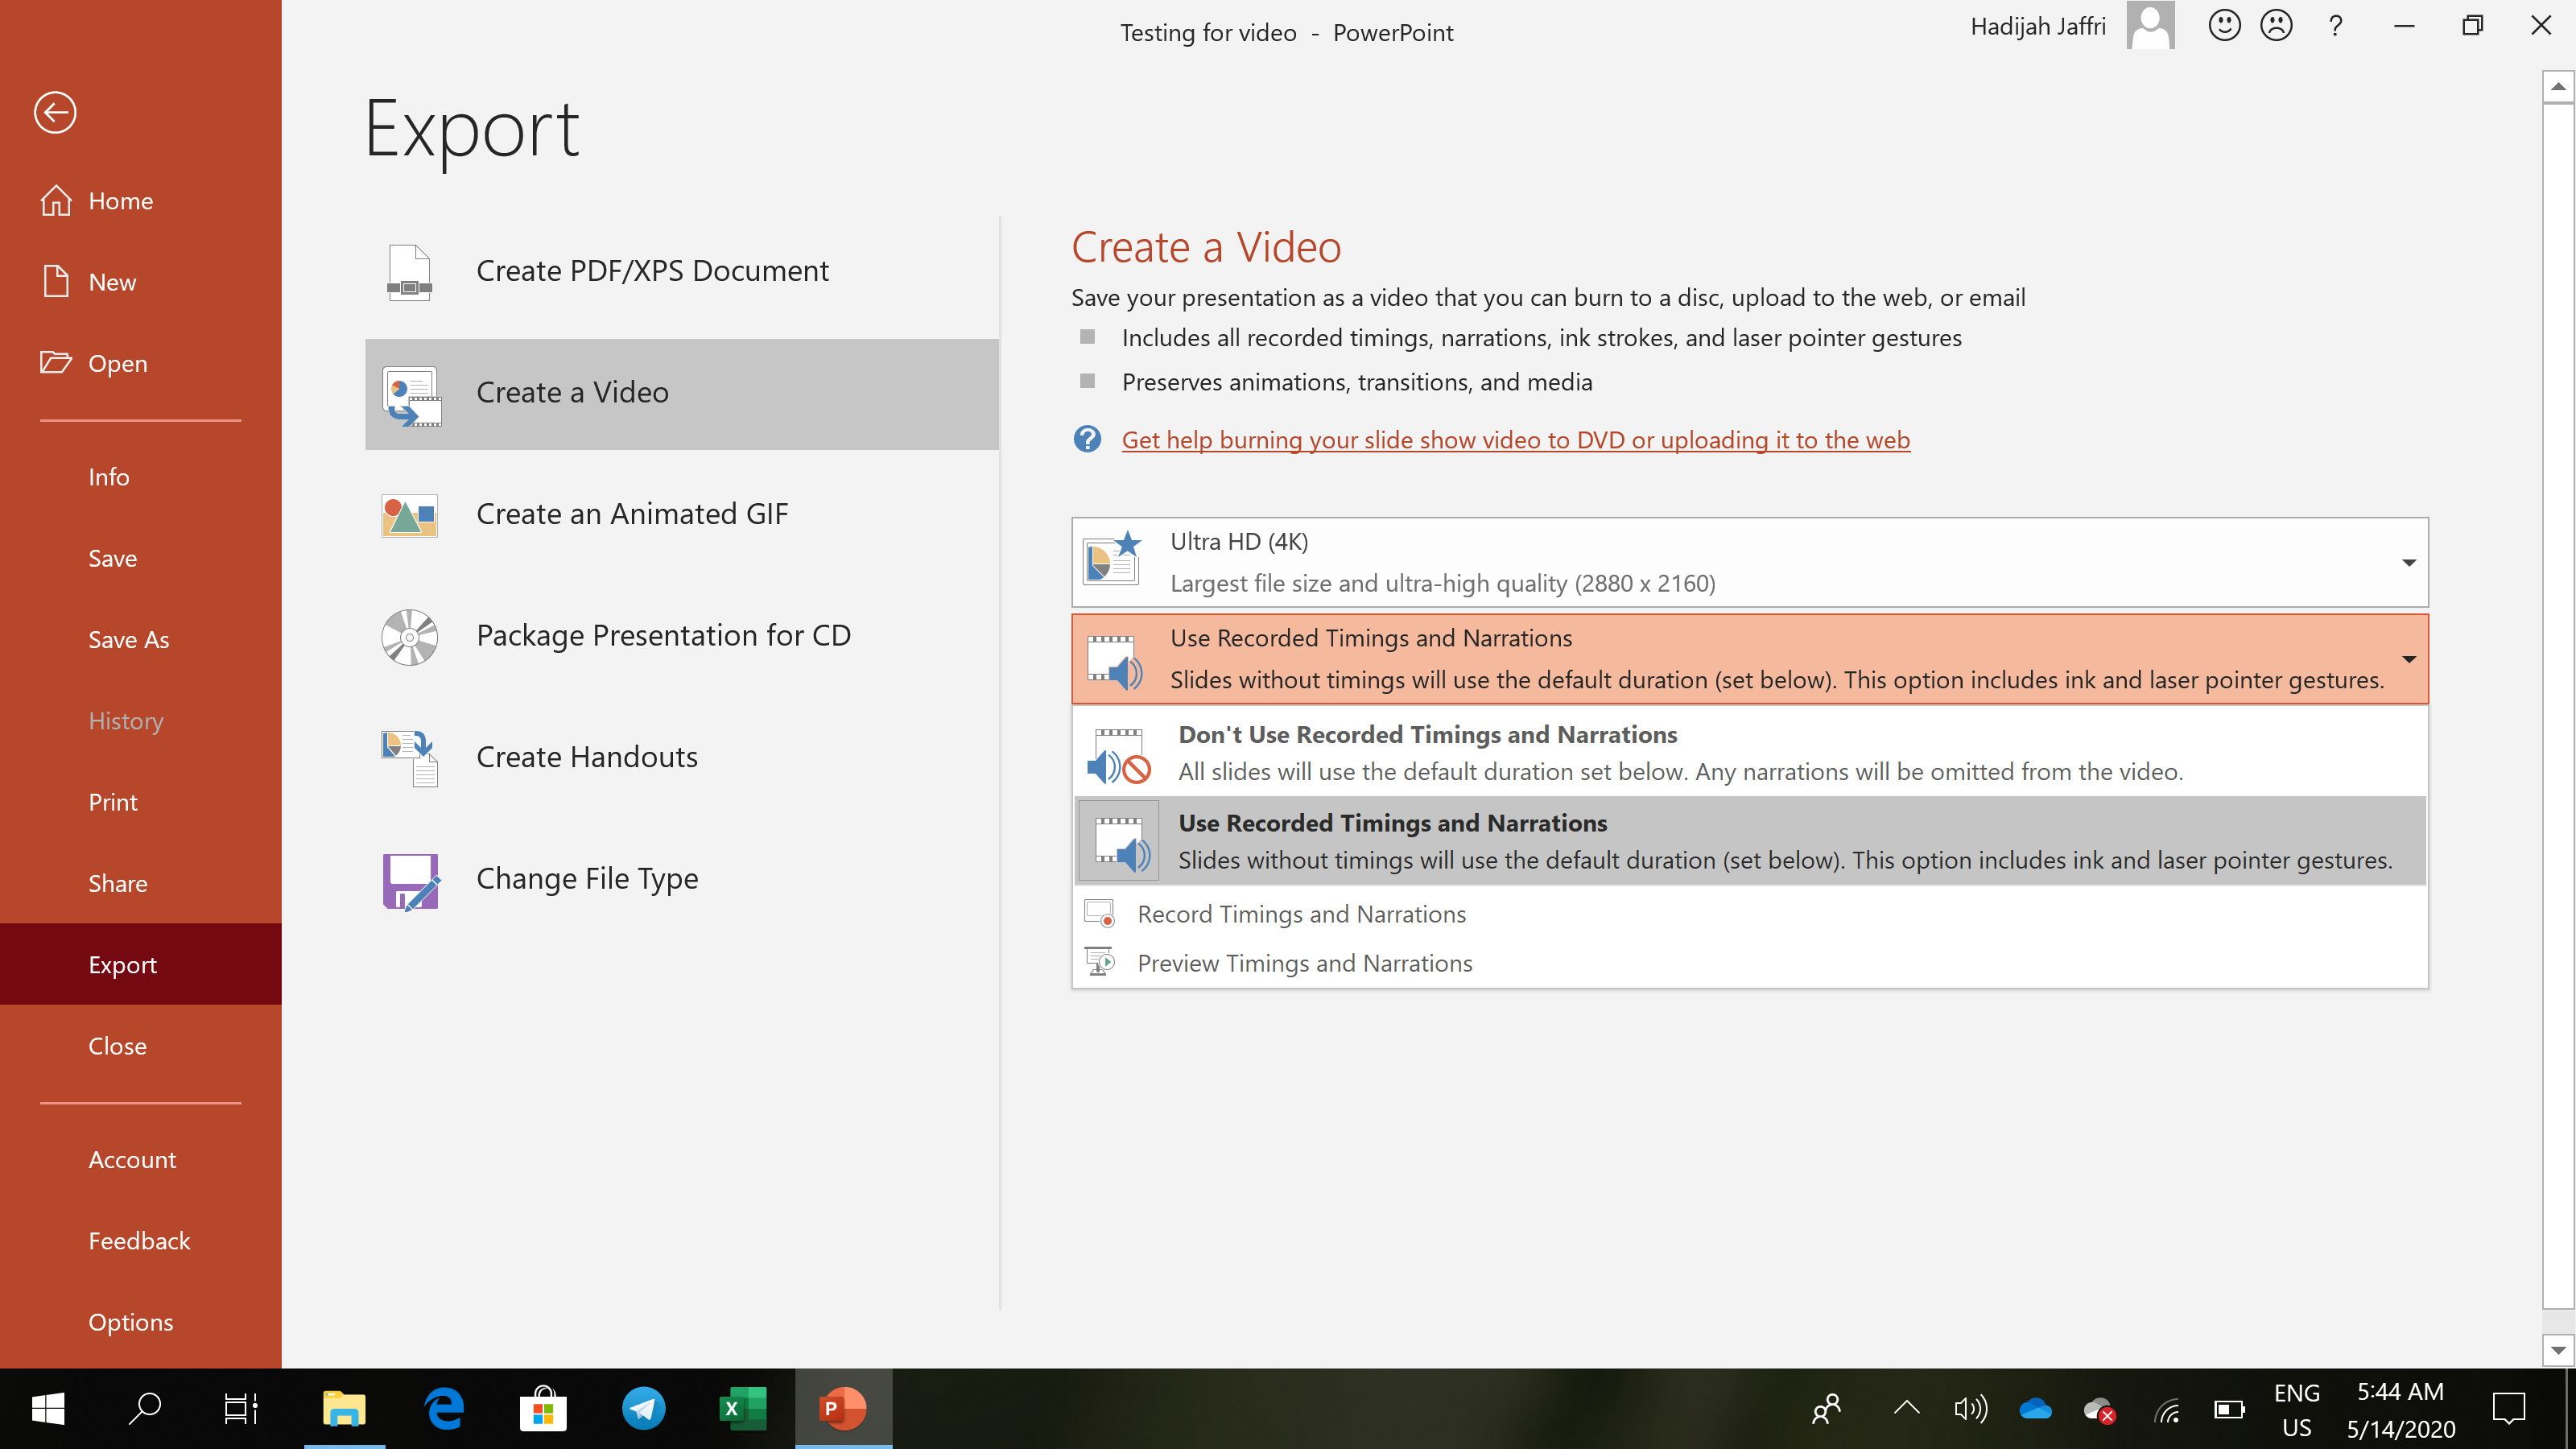
- There are two (2) options that you can choose, either
- Option 1: Use Recorded Timings and Narrations
- If you select this option, your previous recorded timings, narrations, animations or laser pointing gestures will be included in your video
- OR
- Option 2: Don’t Use Recorded Timings and Narrations
- If you select this option, your previous recorded timings, narrations, animations or laser pointing gestures will not be included in your video
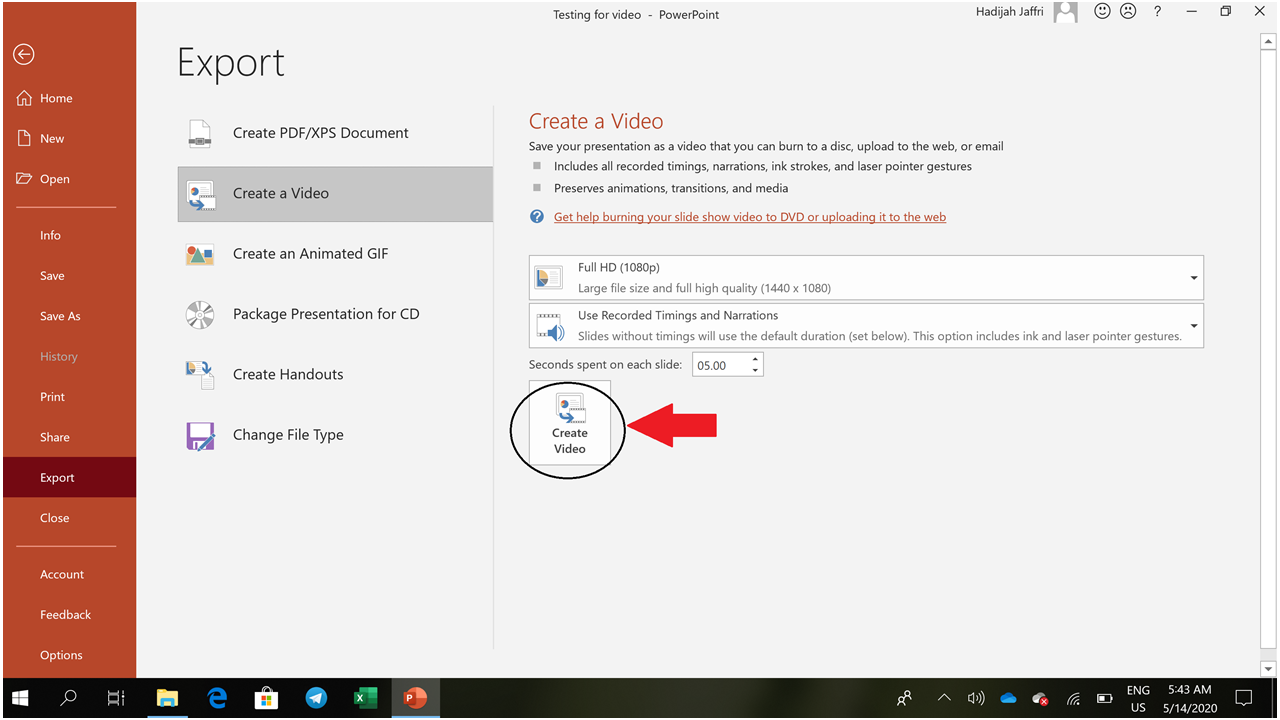
- In the Seconds spent on each slide box, select the default time you want to spend on each slide that do not have any voice recording/timing.
4.Select Create Video.
5. Enter a file name and then browse to the location you want to save your video
6. In the Save As type box, select if you want to save the video as a MPEG-4 Video or Windows Media Video.
Tip: The MPEG-4 Video format is recommended for the best compatibility with video players.
7. Select Save.
8. Please be patient. The video will be generated in few minutes depending on the content of the slides (it could take more than few minutes too). Check the progress bar from time to time at the bottom of the window to see when it is complete. Don’t close your file before it is completed.
Tadaaaa!!!!
Note: I still have not find the best solution to create a video using Prezi.