This is the note that I took while watching Youtube videos. This is also a reminder to myself the steps that I need to follow to use Wakelet to create a content or known as collection. I categorize the steps into three parts. It seems that Wakelet is useful to organise materials, activities and assessments as a one-stop center. Wakelet is free. It is a good alternative to Padlet (I subscribed to Padlet and since there is a change of the pricing, I am thinking about unsubscribed it)
Part 1: Before (Things that are needed)
a) A topic
- Have a topic that you want to create a content/collection in Wakelet. In my case, the topic is a weekly topic. So, I might have sub-topics but it will be included under one content/collection only.
- In addition, if the topic has many sub-topics, it is suggested that there is a picture or a banner to separate the sub-topics. It will give students the direction of the tasks that they need to complete.
b) Weblinks
- Be prepared to have few weblinks that you are intended to use in your lesson. The link could be link to your own videos uploaded in YouTube, online assessment that you have created in different platforms like Quizziz, Kahoot, Socrative and such or any links related to your topic. It could be a link to a journal article (this is when you do not want to upload a PDF version of that journal article).
- If you do have your own videos uploaded in YouTube or elsewhere, this is one of the tips that I got from Wakelet. “Try copying and pasting any link from the web. A YouTube video, news article, podcast or website is usually a good start!“ – Wakelet
c) Personal touch
Share your own creative work in Wakelet.
- If you have a video in Youtube, Flipgrid or a video that you save in Google Drive, you can link the video as well.
- If you have a frame in Padlet which contains instructions for an activity, you can link that as well. No problem!
- CHOOSE the layout first before you add items. But according to Wakelet Academy, they suggest you choose the layout after you have added items. Errmm…. a bit tricky for someone like me to adjust the layout later.
Part 2: During (Let’s get started!)
a) In your home area, click ‘create collection’, and start by giving your content/collection a title and description!
b) You can add a cover image. If you do not have any image of your own, just browse through the integrated Unsplash library and you may find interesting and eye-catching images. You are spoilt with lots of choices.
c) This is just an additional option. If you want to add a background, you may add the background like you add the cover page.
d) Now, you can add some items to your collection by clicking on the plus (➕) icon to begin. You may choose to add text, image, file and so many more! If you have a video on YouTube, Flipgrid, Tik Tok etc., just copy and paste the link. You may add a thumbnail, title and description for your items. If you make any mistake while doing this, you may change the thumbnail, the title, and the description of each item.
Here you go! You have a content/collection. Basic one. If you want to spice up your content/collection, you may look at more steps on Part 3.
Part 3: After (Want to spice up your collection?)
a) It is suggested that you explore collection layouts! There are five different ways (layouts) you can organize your collections on Wakelet!
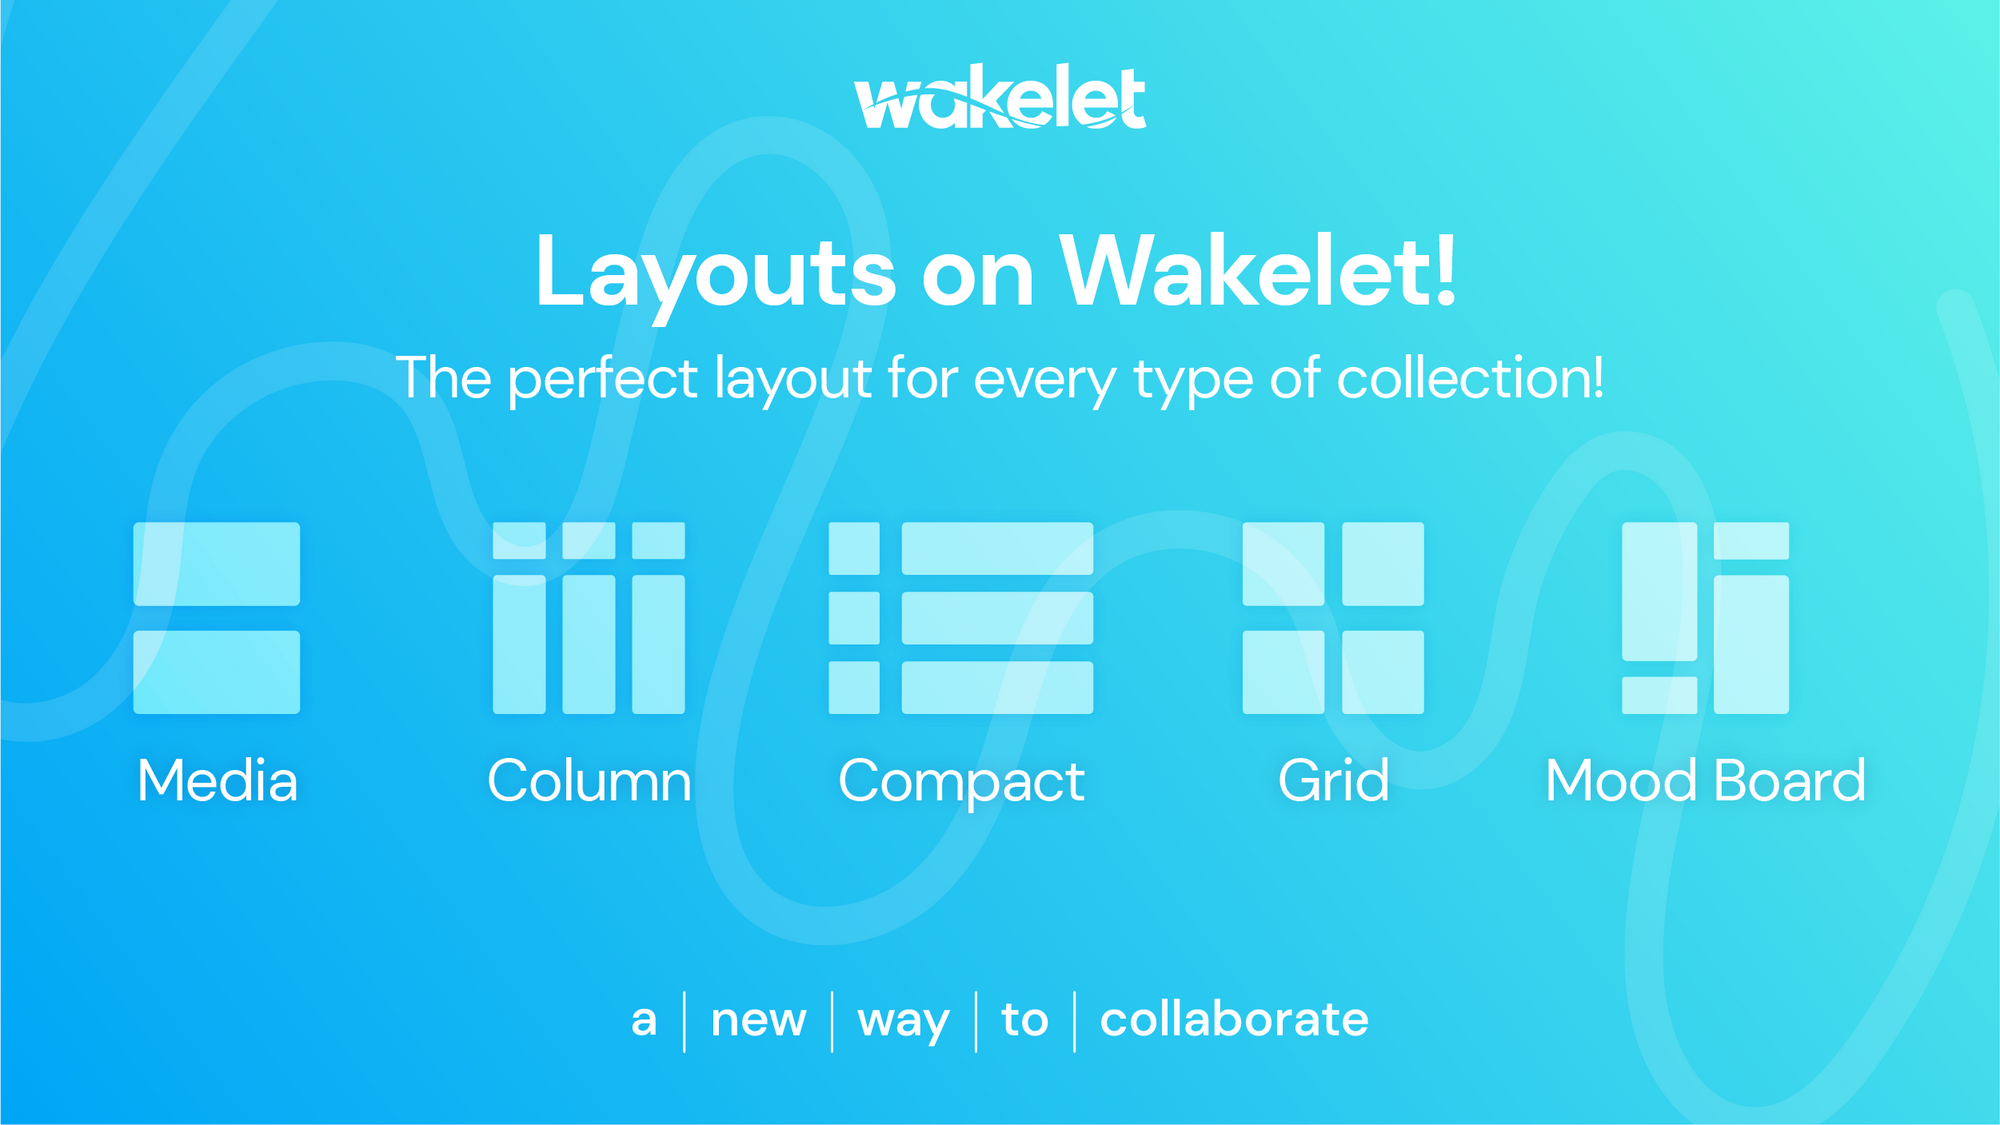
b) To get access to the layouts, click the palette icon.
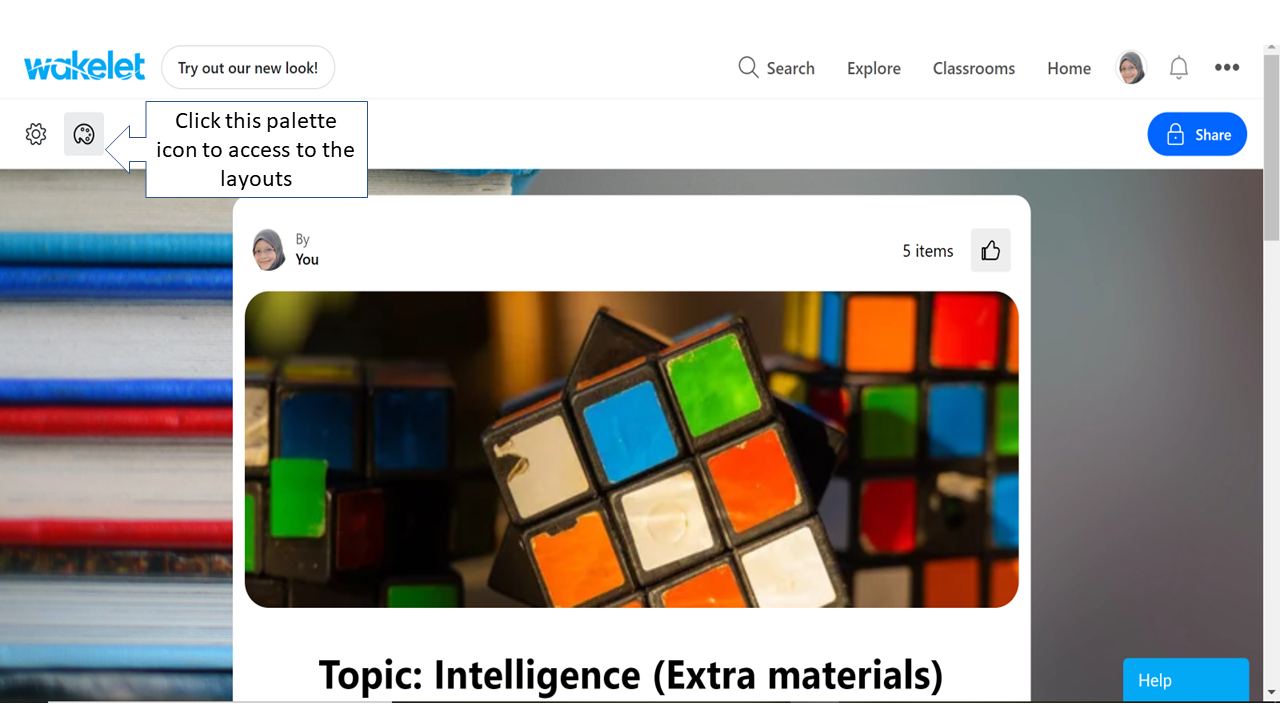
The videos that I have watched on YouTube use either media or compact layout. So, I also use either media or compact layout. But it depends on your preference and imagination. I am still struggling to use Wakelet and thus, I just follow whatever examples as shown in the videos that I watch. But apparently, if you choose the layout setting AFTER you have add items, some of the items might be missing.

Now, your content/collection is ready to be shared with your students. Let’s look at the steps!
